Configure the Tenant Portal
To configure the Tenant Portal, administrative users can access the application's administrative features in the Account Apps section of the Account WorkCenters page.
Tip
ProLinkHFA System Administrators can differentiate roles for Procorem app users. At this time, you can manage the roles for Tenant Portal app users. For example, you might have users who can add, edit, and validate tenant information, while other users can view information only.
See the ProLinkHFA Help Center for information about the Procorem App Security admin option.
Click Go to Account in the left panel.
Click Account Apps in the left panel.
Click Tenant Portal.
The Admin page opens, where you can define the following settings for the application:
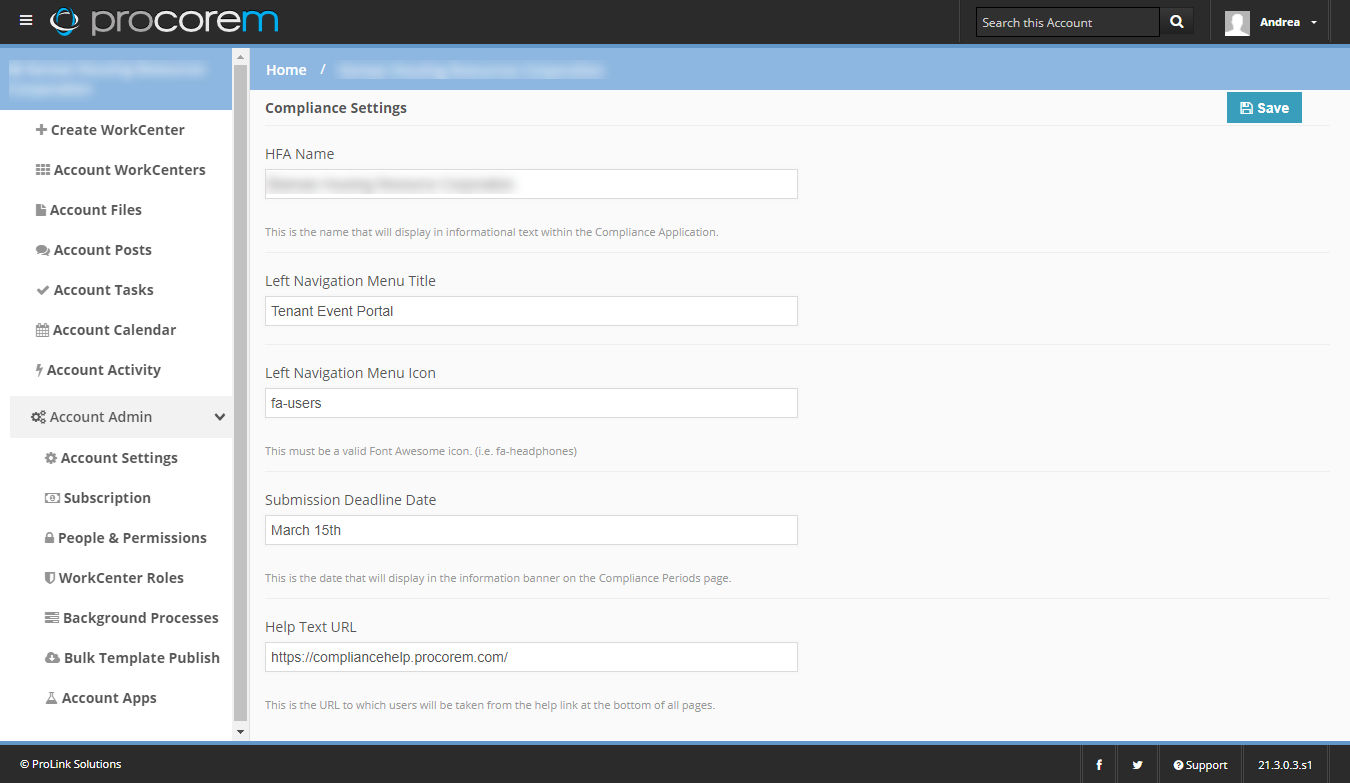
HFA Name—This is the agency name that is displayed throughout the application.
Left Navigation Menu Title—This is the name of the application that is displayed to users in the account WorkCenter. The default name is Tenant Portal.
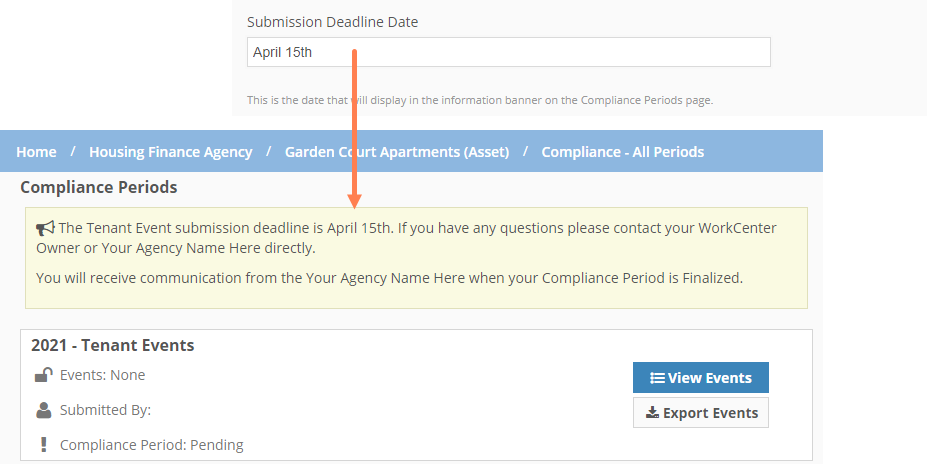
Submission Deadline Date—This is the date that is displayed in the default system banner on the Compliance Periods page (when the app is not configured for a custom information banner).
Help Text URL—This the URL that will open when users click the help link at the bottom of Tenant Portal pages. The default help link is https://compliancehelp.procorem.com/.
Turn on TIC Form Download—When you select the checkbox, the Download TIC button and corresponding Tenant Income Certification form functionality is enabled on the tenant event.
Turn on Income and Rent Evaluation Details—When you select the checkbox, the Income and Rent Evaluation Details section is visible on the tenant event.
Turn on Agent/Owner Assumptions Section for Tenant Event—When you select the checkbox, the Owner/Agent Assumptions section is visible on the tenant event.
Turn on expand/collapse by Building Name—When you select the checkbox, the Units grid for the compliance period is grouped by building, and users can expand and collapse each building section.
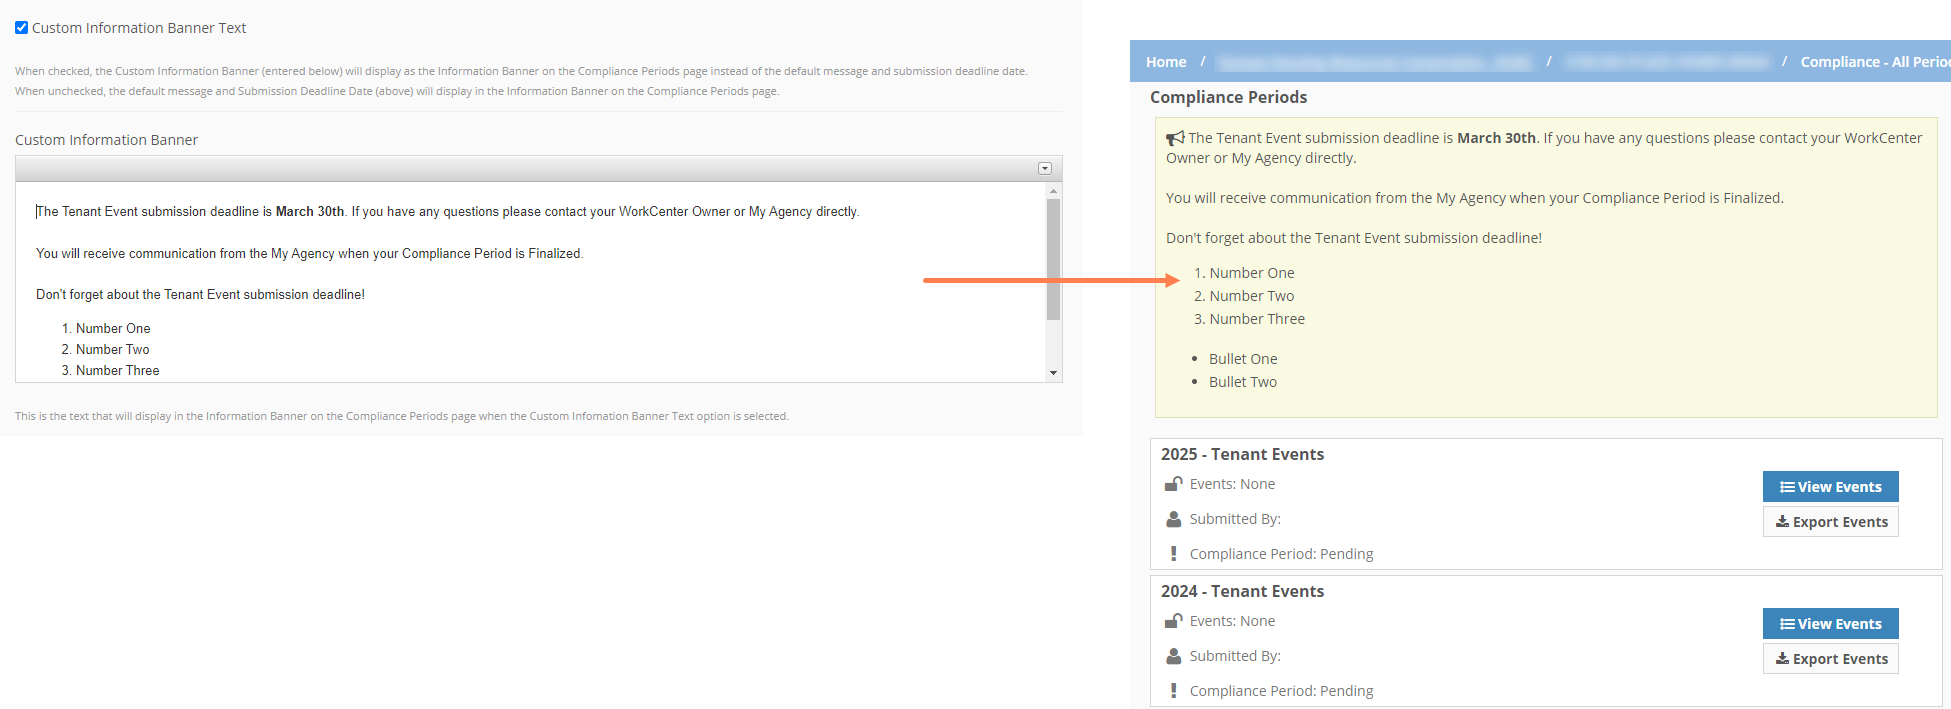
Custom Information Banner Text—When you select the checkbox, the text you define in the text box below is displayed as the banner on the Compliance Periods page. When you clear the checkbox, the default system banner, which shows the Submission Deadline Date, is displayed.